Is Your Bike Ready to Go Electric? The Ultimate eBike Conversion Checklist
by Nathan Bogner on Mar 08, 2024
Hey there, fellow bike enthusiasts! Are those e-bike dreams starting to buzz in your head? Before you dive into the conversion process, let's make sure your trusty steed is up for the wild ride ahead. This checklist will get you off to a smooth start!
Quality Bikes = Quality Conversions
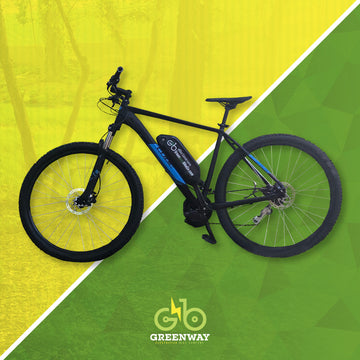
Start with a quality bike. Brand name bikes might not have been built specifically for an electric motor, but the frames are built to last and the components are mid to high range quality. A quality tradition gives you a solid place to start your conversion.
Not Sure About Your Ride? Try Bicycle Blue Book
Think of Bicycle Blue Book as the Kelley Blue Book for bikes! Here's how I use it when assessing e-bike candidates:
- Search for your bike's brand and model. If it's listed, good sign!
- Check the Year: This is important, especially for older bikes where component condition really matters.
- Look Up the Specs: What's the frame made of? What kind of components did it originally come with? These are your baseline.
- Bonus: Check the Original MSRP: If it was over $700 in the past decade, you've probably got a decent foundation to work with.
Big Box Store Bikes: Don’t Do It!
Okay, those tempting super-cheap bikes might be calling your name, but trust me, their frames and components are not built for it. Think about sticking a high-performance engine in a car with a shoddy frame – that's a recipe for disaster!
Key Takeaway: It's all about having a solid foundation for your eBike build. Investing in a quality used bike often beats buying a cheap one new!
- Which Bike Types Work Best?
Get ready for good news: most bikes can be converted into awesome eBikes! The biggest factor is where you'll put the battery. Let's break it down:
Easy Options:
- Cruisers: Battery options galore! Downtube or rear rack mounts are common, making step-throughs perfect for this.
- Hardtails, Gravel Bikes: Triangle frames provide ample space for a classic downtube battery. Some extra reinforcement might be needed for aggressive trail riding.
Unique Considerations
- Trikes & Recumbents: Easy motor access but might require custom battery mounts under the seat or in panniers.
- Fat Tire Bikes: Bottom bracket width matters more than usual here, affecting how the motor and chainring align. Spacers can often solve fitment issues.
- Full-Suspension MTB: Can be done, but battery placement gets tricky. Opt for smaller batteries, under-seat mounts, or creative solutions like backpack batteries.
- Cargo Bikes & Pedicabs: A powerful motor is a must for hauling! Think Bafang 750W or similar, depending on your typical cargo weight.
Tricky But Possible
- Road bikes: Limited battery space, and frame strength is a concern. Smaller wattage motors (under 350W), and careful battery mounting techniques are key.
Kids' Bikes: A Big Nope!
Let those little legs do the work naturally. Plus, it's about learning safe bike handling skills before introducing the extra power and responsibilities of an eBike.
Need more details on a specific bike type? [Chat with an us!]
- The Age Factor: Newer is Better, But Older Bikes Can Rock Too
While newer bikes often mean better condition, older rides can be great for conversions too – if you're ready for the added challenge! Think of it like restoring an old car. My first conversion was a 2004 Specialized Stumpjumper with a seized bottom bracket – took three of us and a breaker bar to get it off! But that bike tackled Slick Rock!
We've converted bikes as old as a '92 Cannondale MTB, and several from that era. Each one had its own unique challenges with parts removal, showing their 'vintage personality, let's say. Upgrades were a must in every case.
Just because it's old doesn't mean it's a bad idea. But know you're getting into a different kind of project that takes extra love, time, and potentially more replacement costs.
Older Bike Inspection Checklist:
- Bottom bracket condition: Seized ones are a major pain that might need special tools. Assess this carefully!
- Rust/visible frame damage: These are potential safety red flags. Frame repair is a whole different ball game.
- Old components: Plan on upgrading the basics, at minimum: shifter cables, brakes, and chains need to be new, reliable, and safe for eBike use.
4: Brakes: Your E-Bike Safety Net
Think faster speeds, extra weight...you NEED stopping power you can trust! Brakes are your most essential safety gear on an eBike. Here's the lowdown:
- Disc Brakes: The Top Choice Powerful, reliable, and they handle wet conditions like a champ. Whether mechanical or hydraulic, they're built for the job.
- V-brakes: A Decent Option While not as strong as discs, properly adjusted V-brakes offer good stopping power for lighter eBike setups. Be prepared for more frequent pad replacements.
- Rim Brakes: Not Ideal Designed for traditional bikes, they often struggle with the extra speed and weight of eBikes. If your bike has these, consider an upgrade before your conversion.
Key Takeaway: Don't skimp on brakes! They're what let you enjoy the full potential of your eBike adventures – and keep those around you safe too.
- And The Rest: Component Condition:
Before diving into your conversion, give your bike a good once-over. Here's your focus:
- Chain Checkup: Is it rusty, worn, or fairly new? A worn-out chain can cause problems with a new motor, so a replacement might be best. Not sure? Most bike shops will do a quick chain wear assessment.
- Frame Check: Keep an eye out for rust and cracks, especially around the welds. These are serious red flags!
- Cables & Shifters: Are they frayed or sticky? Shifting issues or loose cables will only get worse with an eBike's extra power.
- Pedals & Headset: Do the pedals spin freely? Does the headset turn easily? Worn or damaged components need to be fixed to create a safe and smooth e-ride.
- Grips & Seat: Are the grips worn or damaged? Is that seat seated securely? Take care of the touchpoints to ensure comfortable cruising!
Bonus Tip: Clean bikes are easier to work on! Grime and grease hide potential problems and make the whole process less enjoyable.
Key Takeaway: Even simple used bikes often need a little TLC before the electric magic happens. It's worth it to make sure your ride is strong, safe, and ready for its e-bike transformation!
6. Bottom Brackets: The Conversion Cornerstone
The Bottom bracket (BB) is critical to the entire conversion process because this is where the motor mounts to the frame. The two conferences are one, removing the existing BB and two, ensuring the motor will fit in the BB shell. Let’s tackle both.
Figuring out the right tools
There are dozens of different BB standards and each brand has a different way they build BBs. Because of this, there are special tools required. You can figure out which tool you need with this BB identifier from Park Tools. https://www.parktool.com/en-us/blog/repair-help/bottom-bracket-identification. You can buy the tool from Park Tools, on Amazon, or at your Local Bike Shop, they aren’t too expensive. Or just ask your bikeshop to remove it.
Removal Woes
For the most part, bottom brackets don’t cause any problems. However, there are issues that might come up from brake cables in the way to seized locknuts.
Check out our Bottom Bracket Blog for more info on this topic!
Fit Matters
The mounting requirements for the base model for the two top mid drive conversion kits (Tongsheng and Bafang) are the same. To ensure the motor will fit your bike, you need to confirm these three measurements of your BB::
- BB Shell Inner Dimension: ~35mm
- BB Shell Width: between 68mm and 120mm
- BB Clearance: 12mm
You can use calipers or a tape measure to figure this out.
Not sure how to measure? Let us help! Check out our Bottom Bracket Measuring Guide
For widths greater than 120mm, there are wider versions of the motors. We have these available as a special order.
For diameters larger than 35mm, you will need an asymmetric BB converter. We have that here.
Takeaway: Don't let bottom bracket worries derail your conversion. With a little preparation and the right support, you'll conquer this step! Learn more about Fitting and Removing Bottom Brackets
Final Thoughts: Ready, Set, Convert!
Choosing the right bike for your electric conversion is about more than just dreams and enthusiasm (though having those is awesome!). Taking the time to assess these key aspects will save you frustration and lay the groundwork for an amazing e-bike experience:
- Quality Matters: Start with a solid bike. Remember, cheap isn't always cheerful in the e-bike world!
- Bike Type Options: Most bikes have e-bike potential; it's about finding the right fit for your needs and the battery placement possibilities.
- Component Check: A quick pre-conversion inspection makes all the difference. Think safety and a smoother ride.
- Brakes Are Your Best Friend: Upgrading brakes (if needed) is a smart move for your e-bike adventures.
- Bottom Bracket Basics: Know your bike's bottom bracket type, understand if it fits with your motor, or be prepared to find an adapter. It's the key to making everything spin!
The Takeaway: A little knowledge and pre-planning pave the way for an epic e-bike conversion project. While every conversion is a bit different, taking these factors into account puts you on the path to e-bike success!